
Studio Artist 5.5 has numerous preset sketch effects that digital artists can use to create interesting versions of their artwork, and many look good used just on there own. But what if you want to create something unique and different to anything 'straight out of the box'? One way to do this is combining existing presets, so together, they produce artwork visually more interesting than just their individual component parts.
Due to the large number of existing presets Studio Artist provides, just having awareness of what's available can become a time consuming task when browsing and running all the different options, and then there is the question of which presets work well together? The notion of what works well together will of course be subjective, depending on a persons preferences, what type of sketches they like or dislike.
In this tutorial, I use and combine four Studio Artist preset sketch effects to produce 'a look' that I like and would be happy to use for my own personal projects. The presets are:
1. Bidir Hatch
2 . Block Cut C
3. Hatch Scan 3
4. Boundary Elipse Tite
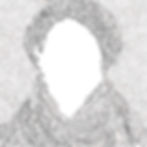
Start Image
The base image for this tutorial was created using Dall-E 2, an Artificial Intelligence (AI) software program that generates images using text prompts submitted by a user to the program. Essentially, its a studio portrait image of an unreal person wearing a hat and scarf against a plain grey background, but other types of image could also be used for Studio Artist sketch effects used in this tutorial.

Finished Image
The final version of the combined sketch effects is shown below for reference. The Bidir Hatch preset is used as a background (with masking to prevent it appearing on the face), while the Block Cut C preset (also with masking) is used for the hat and scarf. The face elements are created using Hatch Scan 3 and Boundary Elipse Tite presets (this time with the masking selection inverted).

Preset 1 - Bidir Hatch
The first preset, Bidir Hatch, is essentially used as a textured background, apart from the face where I used the Lasso selection tool to mask that part of the image. The preset was used with standard default settings in the Editor panel, but if the effect is considered too strong and needs to be reduced, the Fill Blend and Stroke Radius can be reduced in the 'Vector Output' part of the Editor panel. Click the image to see a larger version of the Bidir Hatch output.
Preset 2 - Block Cut C

The second preset, Block Cut C, is used for the hat and scarf sections of the image (again with masking as above, to keep the effect away from the face), so this preset needs to stand out from the background and Block Cut C gives a dark contrast to the pale Bidir Hatch preset used for the background. This preset produces more of a vector style output with solid shapes rather than thin lines typically seen in sketch effects. Click the image to see a larger version of the Block Cut C output.

As with all Studio Artist presets, its possible to edit settings used to create the preset outputs. You could try changing settings for any of the variables, but to keep it simple, just changing the Fill Blend and Stroke Radius settings will often give the desired results if everything else looks ok. As the names suggest, Fill Blend controls the opacity of the effect, while Stroke Radius controls the thickness of any outputs, for example, line thickness. The default settings for these variables is 100, so lowering or increasing this number will reduce or increase the effect output accordingly. See the associated image showing the location of these settings.

If you are likely to use a preset again in the future for other projects, its a good idea to save them at the time of use, either into the Studio Artist default Favourites folder, or alternatively, create a new folder with an appropriate name, eg, Sketch Presets, and save the preset into that folder for easy future access and use.
There are two options for saving presets, either copy the current unedited preset into your preferred folder, or if you have amended any settings in the preset Editor and wish to save the edited version, then use the 'Export Edited Preset' option to save your amendments for future use.
Preset 3 - Hatch Scan 3

The next preset adds sketch details to the face area. Hatch Scan 3 produces hatched line output with density dependent on the light, midtone, and shadow regions of the source image, for example, highlights may have little or no hatching, while shadows will have darker denser hatching. As this effect is intended only for the face area, I inverted the selection mask used for presets 1 and 2. Click the image to see a larger version of Hatch Scan 3 output.
Preset 4 - Boundary Elipse Tite / Final Image

After running the Hatch Scan 3 preset, there are certain parts of the face that have no hatching present in predominantly highlight areas of the source image, so I used the Boundary Elipse Tite preset to add a small amount of extra detail into the face. The difference between this output and the previous stage is quite subtle, so click and view the larger size images to more clearly see any differences. This factor illustrates the importance of ensuring that the start image from which your artwork is created should be edited if necessary with your preferred image editor, so things like image highlights, midtones and shadows are suitable for creating the desired outcome, for example, if you want a high contrast look ensure that the start image has the desired contrast.
I will be adding more Studio Artist 5.5 recipes combining different presets in the future, so do check back occasionally for any new additions.